


Hi Tech Enthu's, In this quick example, let's see how to use form view in django. If you have question about django form view example then I will give simple example with solution. I explained simply about django form view class based views example. So, in this example, FormView refers to a view just be a template to define a template_name and success_url in your form view.
Let's see bellow example here you will learn how to use formview in django.
Step 1: Create a Project
In this step, we’ll create a new django project using the django-admin. Head back to your command-line interface and run the following command :
django-admin startproject example
Step 2: Create a App
Now we'll create a single app called Core to store a list of post names. We are keeping things intentionally basic. Stop the local server with Ctrl+C and use the startapp command to create this new app.
python3 manage.py startapp core
Step 3: Update setting.py
Next, update INSTALLED_APPS within our settings.py file to notify Django about the app.
Next, you need to add it in the settings.py file as follows:
....
INSTALLED_APPS = [
    'django.contrib.admin',
    'django.contrib.auth',
    'django.contrib.contenttypes',
    'django.contrib.sessions',
    'django.contrib.messages',
    'django.contrib.staticfiles',
    'core',
]
Step 4: Create a Form
In this step we need to create a form that will be used [ . ] like add a bootstrap class and validation etc. And also we need to add custom styling.
core/forms.py
from django import forms

class ContactForm(forms.Form):
    name = forms.CharField(widget=forms.TextInput(attrs=
    {
        'placeholder': 'Enter Name',
        'class': 'form-control'
    }))
    message = forms.CharField(widget=forms.Textarea(attrs=
    {
        'placeholder': 'Enter Message',
        'class': 'form-control'
    }))

    def send_email(self):
        # send email using the self.cleaned_data dictionary
        pass
Step 5: Creating the Views
In this step, we need to configure our views. The ContactView page will template and define a form class, open the views.py file and add: core/views.py
from django.shortcuts import render
from django.views.generic.edit import FormView

class ContactView(FormView):
    template_name = 'core/contact_us.html'
    form_class = ContactForm
    success_url = '/thanks/'

    def form_valid(self, form):
        form.send_email()
        return super(ContactView, self).form_valid(form)
Step 6: Creating the Template
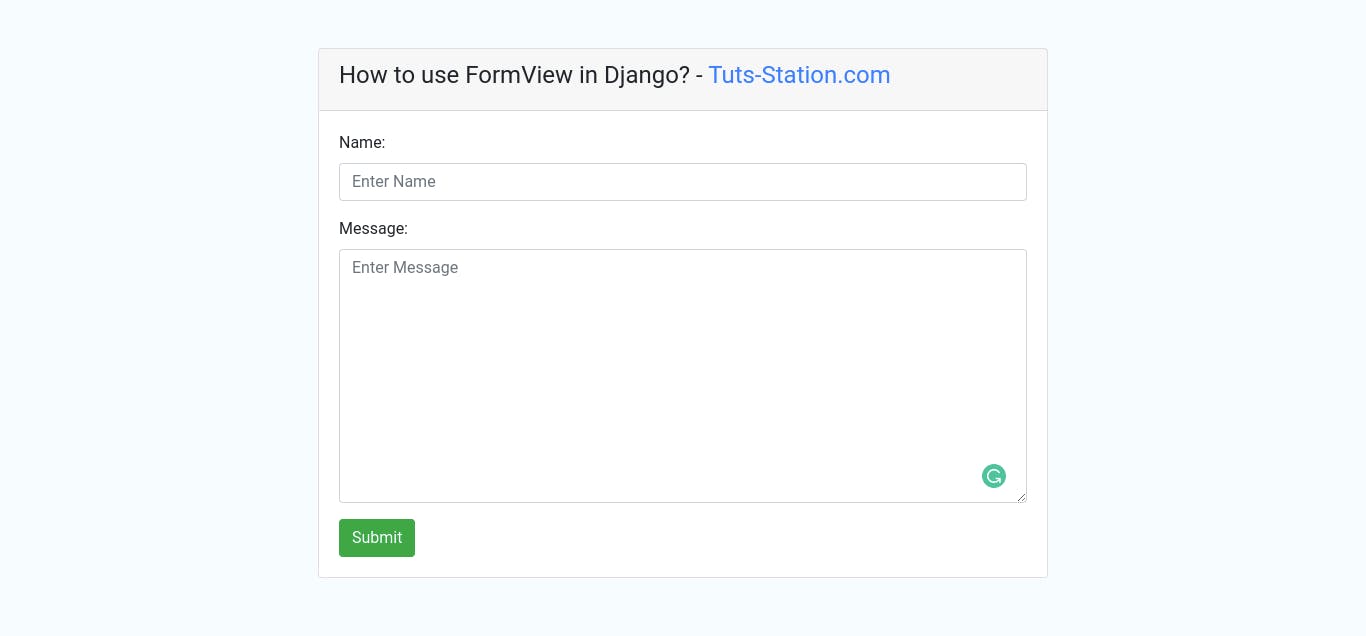
Next, then with your text editor create new templates files: contact_us.html file and the add: contact_us.html
<!DOCTYPE html>
<html lang="en">
<head>
    <meta charset="UTF-8">
    <title>Tuts-Station.com</title>
    <link rel="stylesheet" href="https://cdn.jsdelivr.net/npm/bootstrap@4.6.1/dist/css/bootstrap.min.css">
    <style type="text/css">
        body{
            background-color: #f7fcff;
        }
    </style>
</head>
<body>
    <div class="container mt-5">
        <div class="row d-flex justify-content-center">
            <div class="col-md-8">
                <div class="card">
                    <div class="card-header">
                        <h4>How to use FormView in Django? - <span class="text-primary">Tuts-Station.com</span></h4>
                    </div>
                    <div class="card-body">
                        <form action="" method="post">
                            {% csrf_token %}
                            {{ form.as_p }}
                            <button class="btn btn-success" type="submit">Submit</button>
                        </form>
                    </div>
                </div>
            </div>
        </div>
    </div>
</body>
</html>
Step 7: Creating URLs
In this section, we need a urls.py file within the core app however Django doesn't create one for us with the startapp command. Create urls.py with your text editor and within this file we'll import yet-to-be-created function for each ContactView Note as well that we set an optional URL name for each.
Here's what it looks like:
from django.urls import path
from .views import ContactView

urlpatterns = [
    path('contact/', ContactView.as_view()),
]
Next, we require to add a URL path for our example app which can be done by importing include and setting a path for it. example/urls.py
from django.contrib import admin
from django.urls import path, include

urlpatterns = [
    path('admin/', admin.site.urls),
    path('', include('core.urls')),
]
Run the Server
In this step, we’ll run the local development server for playing with our app without deploying it to the web.
python manage.py runserver
Next, go to the localhost:8000 address (Xamp server) with a web browser.
I Hope It will help you ...
Happy Pythonic Coding!